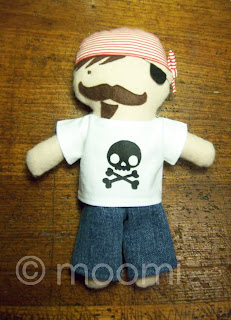
i've finally finished the 3 pirates, but as it's night now the photos i took are shockin' so i'll do more tomorrow
thanks for your feedback guys, i decided to keep all three types of facial hair & let people choose which they prefer, along with eye colour too :)
i also stenciled a pirate-y skull & cross bones design i came up with last night after trawling the internet for ideas! another late night to bed (around midnight) & then i couldn't sleep properly because i was thinking...
anyway, i thought i'd do a little tutorial for the stenciling as it was SO easy & SO much fun :)
so, firstly we have a little list of "ingredients":
- a printer to print your image (or you could do a free hand drawing)
- fabric paint
- fabric item to stencil onto
- a small sponge (in this case, but depending on the size of your stencil you may need a bigger one)
- freezer paper (apparently this is readily available in the supermarkets in the states, i had to order mine from this quilting shop here in oz)
- a pencil or a marker to trace your image
- nice sharp scissors, i like to use these
- an iron
- a clean piece of fabric for setting your image with the iron once paint is dry
trace your image using an
extremely high tech light box

well, it's not really a step as such but
here is your (my) traced image :)
carefully cut out your image
place your stencil on top of the item
you're stenciling & iron on with a hot iron
(not steam)
add any extra bits (in this case the
eyes & the nose are added)
once the stencil is in position,
insert a piece of cardboard
to prevent the paint seeping
onto the other side

again, it's not really a step, but here
is your (my) cardboard inserted behind
my fabric with the stencil on top
prepare your paint & sponge
take a small amount of paint onto
your sponge & dab in onto/over
your stencil - you really don't need
a lot for this small image & a little bit
goes a long way
stencil covered with paint
now wash your sponge etc & wait
for the paint to dry (i hung mine out
on the line as it was a sunny day today)
once the paint is dry, take your spare
piece of fabric and place it over the image
have your iron set to hot (no steam) & iron
the image over the spare fabric for a few
minutes*
voila!
(my first time ever so please excuse the
not-so-good bones) :)
here is one of the pirates
with his new shirt, terrible
photo but it's late & dark
and there ya go, i'll do more photos tomorrow hopefully (if it's not raining again as it did every other day i wanted to take some before) & the guys will hopefully be up in the shop in the next couple of days - hooray!!
*my paint instructions said the iron should be
at 100C but i don't know exactly what that is on
my iron so i just set it to hot, & then to iron the image
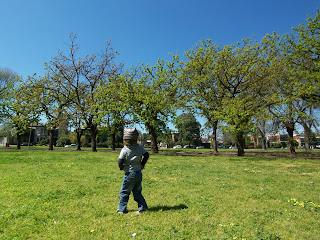
for 3 - 5 minutes to set it i'll leave you with some photos from our day yesterday after we lost out on yet another house at auction (it's becoming quite funny now, i can laugh or i can cry & i think it's less exhausting to laugh) :D
two happy crazies at the gorgeous green edinburgh gardens (result: a good loooong nap for both of them, yeah baby!)
night kids
x


4 comments:
That's awesome!! Well done!
Clever chicken :)
You are so clever Candice, talk about little miss creative.
Very cute! That is a nice clear tutorial too! Thanks for sharing.
thanks guys!
:D
Post a Comment